Replacement Keyboards

Replacement Keyboards for Mac

Despite all the publicity surrounding the potential health risks of computing, most people don’t give more than a passing thought to choosing a new or replacement keyboard for their Macintosh. That’s a shame, because keyboards are probably responsible for the lion’s share of computer-related injuries.

Although they’re not meant to directly compete with each other, two new keyboards from Mac-peripheral veterans Matias and Macally’s illustrate the range of choices available.

Generic Input

True to its name, Matias Keyboard-in-a-Box offers a no-frills option for people on a budget who need a full-size keyboard. The keyboard sports a row of 15 function keys across the top, a numeric keypad at the far right, and a standard complement of cursor-control and page-navigation keys in between. The supplied six-foot cable connects the Mac to an ADB jack on either side of the keyboard. Like other input devices, the solidly built Keyboard-in-a-Box carries a five-year warranty.

The Keyboard-in-a-Box’s nearly silent keys feel a trifle spongy when pressed. As with other conventional keyboards, the Keyboard-in-a-Box’s keys are laid out in neat rows that tend to make your palms angle upward as you type, which puts stress on your wrists. Plastic feet at the back of the keyboard let you tilt it upward slightly; unfortunately, this position only accentuates the bend in your wrists, adding to the strain. (To be fair, these drawbacks are shared by all conventional keyboards. And to Matias credit, the brief manual includes a helpful section on workspace ergonomics and proper typing technique.)

Split Layout

Macally’s SmartBoard is designed to overcome the deficiencies of conventional designs like that of the Keyboard-in-a-Box, although there’s no guarantee that ergonomic keyboards can prevent or lessen injury.
The most obvious difference is the setup of the keys: instead of being arranged in horizontal rows, they’re split into two groups that are angled away from each other. This odd-looking layout, popularized by Microsoft’s Natural Keyboard, helps you keep your hands and forearms in a straight line when you’re typing, which minimizes the strain on your wrists. The two groups of keys are also angled slightly upward at the center, which allows your arms to assume a more natural position.
Unlike those of most keyboards, the SmartBoard’s fold-down feet–Macally’s calls them Wrist Levelers–are located at the front, so they tilt the keyboard backward slightly when they’re deployed. Negative tilt minimizes bending at the wrist, which may help prevent some computer-related injuries.

Unique Keypad

The SmartBoard sports another unusual feature that is claimed to provide additional ergonomic benefits. Instead of being uniform, like the key caps on most other keyboards, the SmartBoard’s keys vary in size, with the largest keys located farthest from the center. According to Matias, this makes it easier to type on the SmartBoard than on conventional or other split keyboards. Although I wasn’t able to verify this specific claim, the SmartBoard was easier on my hands and wrists than other keyboards I’ve used.

Alas, the SmartBoard also differs from standard keyboards in a few annoying respects. For example, there are only 12 function keys, so you’ll need to find a workaround if any of your applications require F13 through F15. The power key is located at the bottom left of the keyboard: it’s easy to hit it accidentally, bringing up the Mac OS shutdown dialog box.

It also took me a while to find the +/= key at the top right of the keyboard, instead of in its customary place next to the delete key. (According to Matias, the SmartBoard’s unusual key placements were necessary to keep the keyboard’s footprint small enough for the keyboard to fit on standard keyboard trays. The SmartBoard is actually an inch narrower than the Keyboard-in-a-Box.)

Like most other unorthodox keyboards, the SmartBoard has a definite learning curve–it took me more than a week to work back up to my usual typing speed. If you use a SmartBoard at home and a standard keyboard at the office–or the other way around–you may find it hard to switch back and forth every day.
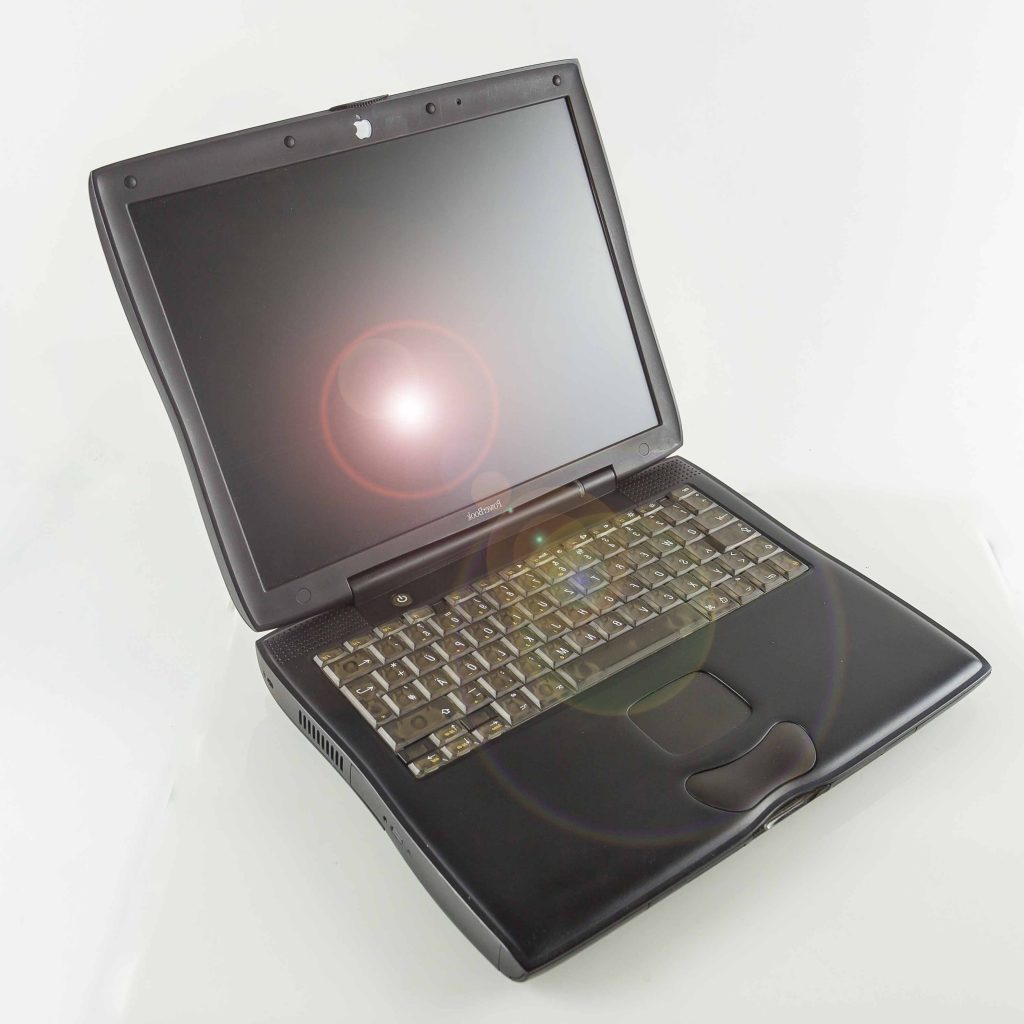
PowerBook G3/300

Review PowerBook G3/300 – Back To History

The PowerBook G3/300, which represents the high end of the portable line, is the only Apple notebook bundled with a DVD-ROM drive and an MPEG PC Card, both of which are needed to run DVD movies. If you have a different PowerBook G3 model, you’ll need to buy a DVD kit for movie playback, and none were available as we went to press, even though one is on Apple’s price list for $499. Due to supply constraints, Apple suspended the build-to-order option for PowerBooks at least until October, but the company says it does not plan to offer the DVD kit separately at that time. Once the kit ultimately does become available, it will work with all PowerBook G3 models introduced since last May–as long as they have an active-matrix display. (Passive-matrix screens can’t properly support DVD due to their lower refresh rates.)

Power Book G3

Luckily, this PowerBook configuration is an exceptionally good value: a 300MHz PowerPC G3 with a 1MB backside cache; an 8GB hard drive; 64MB of RAM; 4MB of SDRAM for video; and, of course, the DVD-ROM drive and MPEG PC Card–all for $4,999. Compare this with the same configuration of the 292MHz G3 portable that this machine replaces, which cost $600 more and didn’t include the DVD kit.

You also get a super sharp, 14.1-inch, color, active-matrix screen, which will now be standard equipment on all new PowerBook models except for one under-$2,000 “value” configuration with a 12-inch passive-matrix screen. (Apple has also boosted performance on the low end of the line by adding a much needed 512K backside cache to the 233MHz PowerBook G3.)
As for the DVD capability, you have to see it to believe how great a movie can look played back full screen on the PowerBook’s active-matrix display. Video purists may find fault in the modest pixel interpolation required to take native DVD resolution up to the PowerBook’s full 1,024-by-768-pixel display, but you always have the option of shrinking the image down to 720 by 480 pixels.

Of course, playing a movie won’t do you much good if the battery runs out during the cliffhanger, which might happen if you don’t manage your power wisely. In tests where virtual memory was on and the hard disk stayed spinning, battery life fell short of 11/2 hours. But with virtual memory off, we could eke out two hours, enough for most full-length movies. However, we noticed occasional video stuttering as the hard drive accessed vital routines.

One solution to the power drain would be to put the laptop to sleep and pop in a fresh battery, but this doesn’t work because the Apple DVD Player quits if you invoke the sleep option. Luckily, the DVD software lets you jump directly to a scene, so you can get pretty close to where you left off, should you need to switch batteries. However, this works only if the DVD title supports scene selection.

Despite the inability to put a movie to sleep, Apple’s DVD software is easy to use and supports all major DVD features, including subtitles and second audio-program tracks.

Speeds and Feeds

The PowerBook G3/300 also supports resolution switching, another standard feature on new Apple laptops. Instead of being locked into the single 1,024-by-768-pixel resolution of the previous G3 PowerBook models, the new portables can reset the built-in display to 800-by-600 or even 640-by-480 resolution. However, the PowerBook’s antialiasing (pixel smoothing) is fairly primitive and leaves images at these lower resolutions looking somewhat out of focus. Whatever you do, don’t combine lower resolutions with DVD video–the results aren’t pretty.
We saved CPU performance for last because it is the least-interesting improvement on this model. While Apple kicked up the processor speed from 292MHz to 300MHz, it reduced the bus speed from 83MHz to 66MHz. The result is largely a performance wash (see “Faster by a Nose”).
A couple of other nice performance tweaks: as on the iMac, Apple has added support for the V.90 protocol to the modem built into all new PowerBooks. In our tests, the modem could more consistently make faster connections than could older modems following the K56flex protocol. (Apple plans to offer a software patch for download from its Web site so you can upgrade older modems to V.90.) Apple has also added ATI’s latest low-power 3-D-acceleration chip set, Rage LT Pro. This, combined with the built-in 4MB of video RAM, makes for pretty snappy portable game play.

Buying Advice

Being a mobile-computing aficionado and a movie buff who’s already invested heavily in the DVD format, this reviewer greeted the arrival of the new DVD-equipped PowerBook with a mixture of joy and chagrin. Joy, because no product could be better suited to his travel needs than a DVD theater that fits in a briefcase. Chagrin, because like any good PowerBook fanatic, he had already bought a high-end PowerBook without DVD.
However, sore feelings aside, the new PowerBook is a good step forward for a product that was already at the top of its class in price and performance. For some high-end users, the DVD alone will justify buying a new PowerBook G3/300 and passing your DVD-less notebook down the company food chain.

Mac Top Tips

Best Tips for Mac

  • Duplicate Find File to Find Files Faster

To run simultaneous searches, copy your Find File application and rename it. Then you can start one search with the first Find File program and a second one with the renamed copy. Your Mac processes both searches simultaneously, and when they’re complete, each copy will display the search results in a separate Items Found window.

  • Hot Tip: Skip the https://

You don’t have to type a URL in its entirety, https:// and all. For the URL https://www.apps-mac.com/, for example, you can simply type macworld in your browser’s location field.

  • Keeping Project-Related E-mail with Other Project Files

It’s nice to have a folder in which you keep all files associated with a particular project. You can also put e-mail associated with a particular project into that folder by doing the following: In Qualcomm’s Eudora create a mailbox for a new project. Next, make an alias of the project mailbox (not the .toc file), which is stored in the Eudora folder, usually found in the System Folder. Place this alias in your project folder. You now have project files and e-mails all in one convenient place.

  • Make Mounts Count

When you mount a server volume across a network, do what you must and then press command-Y to unmount it. Keeping servers mounted unnecessarily bogs down the network.

  • Hit Cancel to Reset

To reset the choices inside many of Adobe Photoshop dialog boxes, press the option key to change the Cancel button to Reset, then click on the Reset button to bring back the original values. Or press option-escape or command-option-period.

  • Make Browsing Easier

Hey, Webmasters, if your Web site uses special features, such as embedded Adobe Acrobat files, JavaScript, or Macromedia Shockwave animation, be cognizant of the first-time user. Make sure you’ve built hyperlinks to the appropriate Web pages or program files so that Internet rovers will be able to easily download what they need in order to enjoy those features of your page.

  • Easily Adding Words into QuarkXPress

Adding new words or a long list of acronyms to an auxiliary dictionary in QuarkXPress can be a time-consuming task. Here’s a way to automatically add all the words in a QuarkXPress document to the active auxiliary dictionary. First, open the auxiliary dictionary to which you want to add words and begin a spelling check. When the spelling check stops at the first unknown word, hold down the shift and option keys while you click on the Cancel button. Voila! The open auxiliary dictionary now contains all the words in the document.

  • Power Navigation through Excel

Don’t bother tabbing through the empty cells in a Microsoft Excel spreadsheet. Hold down the command or control key when pressing the up, down, left, or right arrow keys to leapfrog over empty cells and move directly to the next nonadjacent filled cell in a row or column. Use these keystrokes within a block of data to jump to the edge of the current block.

  • Keep Applying the Same Attributes

You can automatically apply the same field or object formatting to all subsequently created fields and objects in ClarisWorks. In Layout mode, select the pointer tool and click on an empty spot in the layout (making sure that nothing is selected). Then choose formatting options from the palettes and menus. Additional fields and objects that you create are automatically formatted with the attributes you’ve chosen.

  • Thank You for PhotoText

PhotoTools’ PhotoText filter eliminates most uses for Adobe Photoshop’s native type tool and offers a few unexpected keyboard shortcuts: First, you can press the option key to access the arrow tool when the type tool is active. Better yet, you can press command-tab to switch back and forth between the type and arrow tools.

  • Sending Attached Files

Instead of using the Message, Attach Document, and Open File Dialog menu items in Qualcomm’s Eudora to attach a file to an outgoing e-mail, you can simply drag and drop a file onto the Eudora icon (or an alias thereof), and it automatically attaches to the document you are composing.

  • Customize Your Stickies

You can create customized Stickies for phone messages and to-do lists by setting up a new Stickies note in whatever style you like–you can even insert default text across the top. Then choose the Export Text command from the File menu and choose the Save As Stationery check box. Give the note a name, then click on Save. Instead of writing the note into the standard Stickies file inside the Preferences folder in the System Folder, create a New Notes folder in your Apple menu and keep all your customized Stickies stationery tucked there.

  • Create Colors Quickly

To add a new color to Adobe PageMaker Colors palette, don’t bother with the hassle of the Define Colors dialog box. Just go into the Color Options dialog box directly by command-clicking on any of the Black, Registration, or None colors in the Colors palette. Because you can’t edit these colors, PageMaker lets you create a completely new color instead.

  • Getting Out of an Option Box Rut

If you press a key and Adobe Photoshop doesn’t seem to react–or worse, it beeps at you–it’s probably because it’s trying to apply the command to an active option box. To get out of the option box and return control to the image window, press the return key.

  • Handling Layers in Photoshop

Used to working with layers in Adobe Photoshop? The latest version method of pasting a selection into a layer mask can be confusing. To do so without creating a new layer, option-click the layer mask thumbnail to view only the mask, and then paste your selection. Alternatively, use the Channels palette to select the mask channel and make it visible, then paste.

  • Getting To the Colors

Colors are now more convenient in Adobe Illustrator, but you have to know how to get to them. The four important key shortcuts to memorize are comma, period, slash (all in a row on the keyboard), and X. Press X to switch back and forth between the fill and stroke. Press the comma key to fill or stroke a selected object with a solid color and display the Color palette (if it’s not already visible). Press the period key to fill a selection with a gradation and display the Gradient palette. Press the slash key to make the fill or stroke transparent.

  • Zooming in Photoshop

The latest version of Adobe Photoshop lets you zoom to 100 percent view size (that is, doubling the size of the view) from the keyboard by pressing command-option-0 (zero). You can also press command-0 to reduce or magnify the image so it exactly fits on screen.

  • Make Better FileMaker Pro Searches

In FileMaker Pro’s Find mode, precede your keyword with an equal sign to find exact matches. For instance, Apple will find instances of Apple but not Applebaum. To find specific pieces of text, bound your keyword or phrase by quotation marks. For instance, “!” finds records with exclamation points, while just ! finds duplicate records.

  • At Home on the Range

One-click navigation shortcuts are always better than endless scrolling or tabbing through a Microsoft Excel worksheet. Use the home key to scroll your spreadsheet to the top of your current column. Command-home teleports you to the first cell of the current worksheet, and command-end zips you down to the last cell of the entire worksheet. If your work is spread across several worksheets, use option-left arrow and option-right arrow to move from worksheet to worksheet without clicking on the sheet tabs at the bottom of the screen.

  • Change Columns Easily in PageMaker

Do you want to change the number of columns in an Adobe PageMaker layout, but shy away from all the steps involved? Try this: instead of cutting an unwanted column, just select one of its window shade handles. Then roll it up or down until it touches the other handle. That’s it. If you select any other element and then try to reselect the original column, you’ll find it’s disappeared, and the text automatically reflows into the remaining columns. Then, just resize the text blocks to fit the new column layout. If you want to add a column, click on the + symbol at the bottom of any column’s window shade, then click the cursor where you want the new column to appear. The text flows from the window shade with the + into the new column.

  • Target Practice

To make sure you don’t grab a column guide in Adobe PageMaker while you are trying to select a neighboring graphic on the page with the arrow tool, press command as you select.