How to change NVME on MacBook Air 2017
Upgrading the storage of an Apple MacBook Air to an NVMe SSD involves replacing the existing solid-state drive with a compatible NVMe SSD. This typically requires opening up the MacBook Air’s case, removing the old SSD, and installing the new one. It is important to ensure compatibility with the MacBook Air’s specific model and generation before proceeding with the upgrade. Once the new NVMe SSD is installed, the MacBook Air should experience significantly faster read and write speeds, resulting in improved performance overall.
To use an NVMe drive to upgrade your Mac’s SSD, you need to first check if your Mac is compatible (up to 2017 year models) with this type of drive. If so, purchase the NVMe drive and an enclosure. Next, backup your data and open up your Mac to remove the current SSD. Insert the NVMe drive into the enclosure and connect it to your Mac. Use disk utility to format the new drive and then clone your old SSD to the new drive. Replace the old SSD with the new NVMe drive and you’re done!

NVMe (Non-Volatile Memory Express) is a high-performance interface that allows solid-state drives (SSDs) to connect directly to a computer’s PCIe bus. This results in significantly faster data transfer rates compared to traditional SATA-based SSDs. NVMe drives can achieve speeds of over 3GB/s read and write, which is several times faster than even the fastest SATA-based SSDs. Additionally, NVMe drives have lower latency, allowing for faster access to data, and they are also more power-efficient than traditional SSDs. Overall, NVMe offers a significant boost in performance for data-intensive applications and tasks.
a) Please power down your MacBook and place it top-side down on a soft surface before proceeding.
b) To remove the lower case of a device, you will need a P5 Pentalobe driver to remove the ten screws securing it (Two 9 mm screws and Eight 2.6 mm screws). Begin by locating the screws on the bottom of the device and place the driver into each of the screws. Turn the driver in a counter-clockwise motion to remove each screw. Once all ten screws have been removed, gently lift the lower case off the device to access the internal components. Remember to keep the screws in a safe place for reassembly later.
c) Remove the lower case and set it aside.
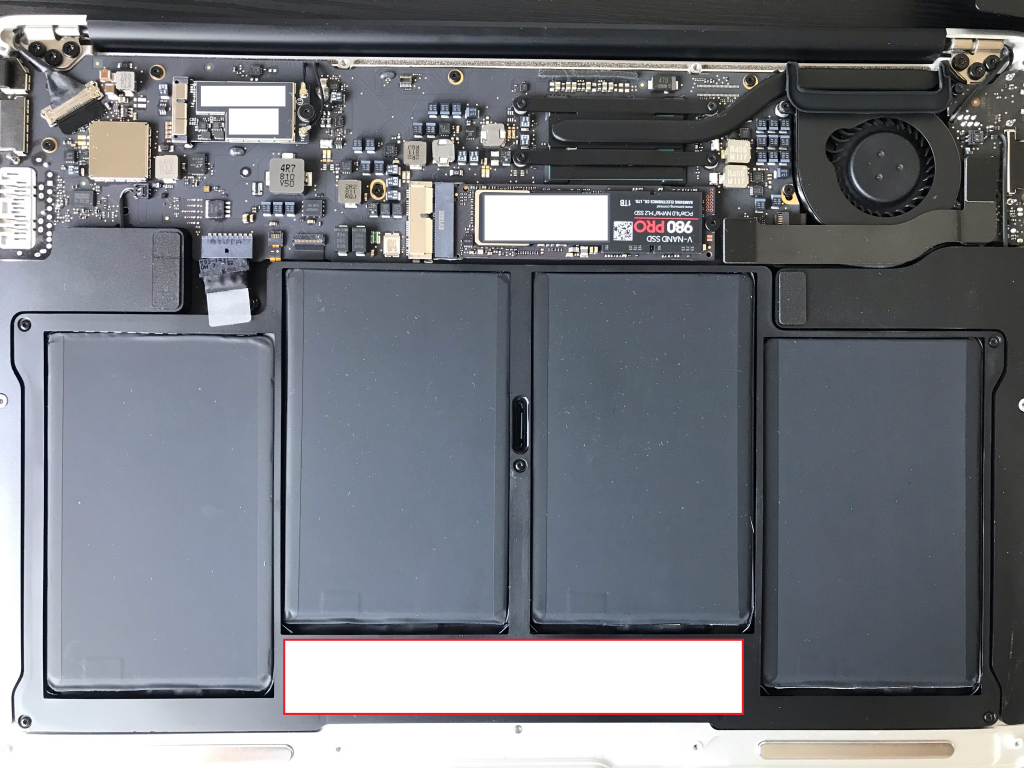
d) To remove the SSD from the logic board, you need to first locate the single 2.9 mm T5 Torx screw. Use a T5 Torx screwdriver to unscrew it and set it aside. Once the screw is removed, carefully slide the SSD out of its slot on the logic board. Be sure to handle the SSD with care and avoid touching the exposed circuitry to prevent damage. With the SSD removed, you can now replace it or perform any necessary maintenance or upgrades.
e) To install the SSD, first insert the adapter into the socket. Then, carefully insert the SSD into the adapter, making sure it is properly aligned and securely in place. Make sure all connections are secure before turning on the device to ensure proper functionality.
Apple Mac Air 2017 NVME performance review
|
Read |
Write |
Xcode Benchamrk |
| Original Drive (128 GB) |
316MB/s |
893MB/s |
785 sec |
| Samsung PM 991 (512 GB) |
800MB/s |
400MB/s |
770 sec |
| Samsung 980 Pro (1 TB) |
1200MB/s |
1292MB/s |
736 sec |
From a Terminal, use the following command to disable hibernation and TRIM: “sudo pmset -a hibernatemode 0” and “sudo trimforce disable”


